How to Build and Release a Flutter APK and App Bundle
Release your Flutter Android app step by step: app name, package ID, app icon, version, upload key signing, building a release APK and App Bundle, and preparing for Google Play.
By Yaqoob Developer · · 8 min read
- #Flutter
- #Android
- #APK
- #App Bundle
- #Google Play
- #Release
Your app works on your phone. Now you want to share it: send an APK to friends, or publish it on the Google Play Store. This guide walks you through every step: app name, app icon, version number, a signing key, and building a release APK and App Bundle.
In this post you will learn:
- The difference between debug and release builds
- The difference between an APK and an App Bundle (AAB)
- How to change your app's name and package name
- How to set a custom app icon
- How to set the version number
- How to create an upload key and sign your app
- How to build the release APK and AAB
- What happens next on the Play Store
- How to fix common build errors
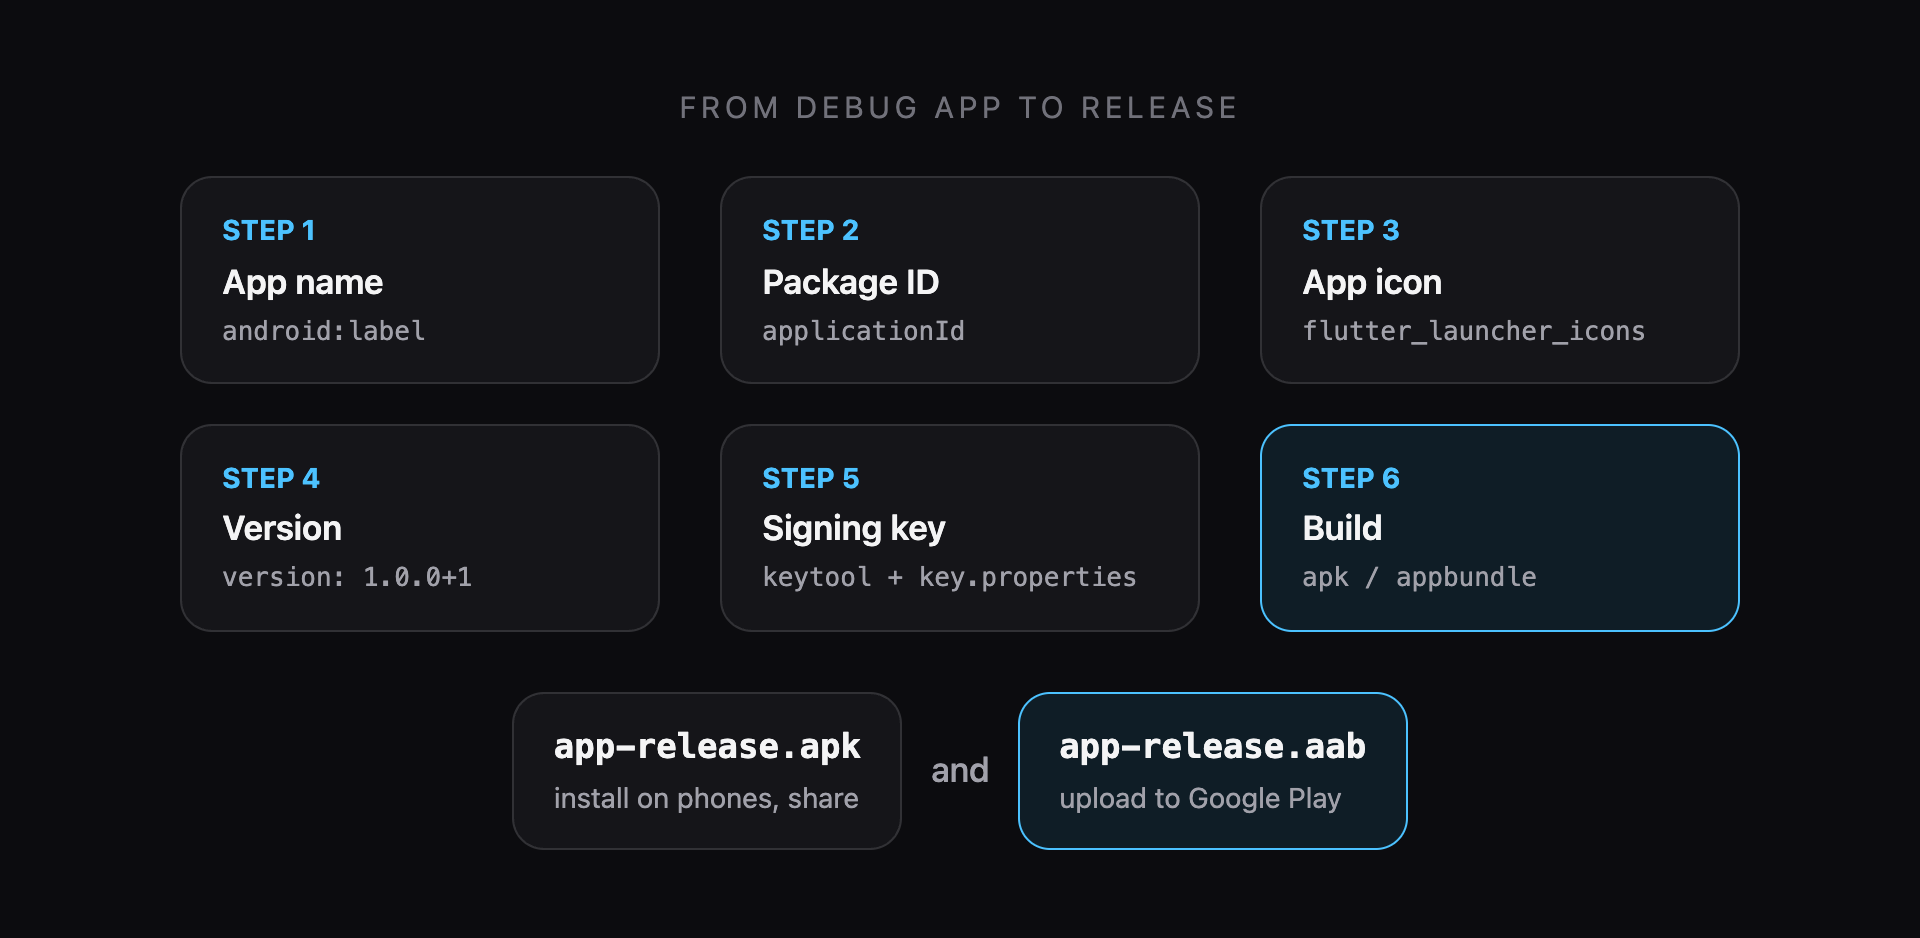
Debug vs release
When you press Run in your IDE, Flutter makes a debug build. It supports hot reload, but it is large and slower.
A release build is optimized: it is much smaller, much faster and has no debug banner. Always test a release build before sharing:
flutter run --release
APK vs App Bundle (AAB)
APK (.apk) | App Bundle (.aab) | |
|---|---|---|
| Install directly on a phone? | ✅ yes | ❌ no |
| Upload to Google Play? | ❌ no (for new apps) | ✅ required |
| Size for the user | larger (all devices in one file) | smaller (Play builds an APK per device) |
| Use it for | testing, sharing with friends | publishing on the Play Store |
You will usually build both: an APK for testing and an AAB for the Play Store.
Step 1: Set your app name
The name under the icon on the home screen comes from android/app/src/main/AndroidManifest.xml. Find android:label and change it:
<application
    android:label="Todo Master"
    android:name="${applicationName}"
    android:icon="@mipmap/ic_launcher">
Step 2: Set your package name (application ID)
Every Android app has a unique ID, like com.yourname.todomaster. New projects use com.example.your_app, and Google Play does not accept com.example.
Open android/app/build.gradle.kts and change applicationId in defaultConfig:
defaultConfig {
    applicationId = "com.yaqoobdev.todomaster"
    minSdk = flutter.minSdkVersion
    targetSdk = flutter.targetSdkVersion
    versionCode = flutter.versionCode
    versionName = flutter.versionName
}
Rules for the ID:
- lowercase letters, numbers and dots only, like a reversed website address
- it must be unique on Google Play
- it can never change after you publish, so choose carefully
If you use Firebase, run flutterfire configure again after changing the ID. (See How to Connect a Flutter Project to Firebase.)
Step 3: Set a custom app icon
The easiest way is the flutter_launcher_icons package. It generates every icon size for you.
- Create a square PNG icon, at least 1024 × 1024 pixels, and save it as
assets/icon/icon.png. - Add the package as a dev dependency:
flutter pub add dev:flutter_launcher_icons
- Add this to the end of
pubspec.yaml(no indentation, at the same level asflutter:):
flutter_launcher_icons:
  android: true
  ios: true
  image_path: "assets/icon/icon.png"
  min_sdk_android: 21
  adaptive_icon_background: "#FFFFFF"
  adaptive_icon_foreground: "assets/icon/icon.png"
- Generate the icons:
dart run flutter_launcher_icons
Uninstall the old app from your phone, run it again, and the new icon appears.
The adaptive_icon_* lines create an adaptive icon for modern Android, which can be shown as a circle, a square or a rounded square depending on the phone. Keep the important part of your foreground image in the center, because the edges can be cropped.
Step 4: Set the version
The version lives in pubspec.yaml:
version: 1.0.0+1
It has two parts:
1.0.0is the version name that users see in the Play Store.+1is the version code, a whole number Google Play uses to know which build is newer.
Every time you upload a new build to Google Play, the version code must be higher than the previous one:
version: 1.0.1+2   # small fix
version: 1.1.0+3   # new feature
Step 5: Create an upload key
Android apps must be signed with a key, which proves updates come from you. Create one with keytool, which comes with Java (Android Studio includes it).
macOS / Linux:
keytool -genkey -v -keystore ~/upload-keystore.jks -keyalg RSA \
        -keysize 2048 -validity 10000 -alias upload
Windows (PowerShell):
keytool -genkey -v -keystore $env:USERPROFILE\upload-keystore.jks `
        -storetype JKS -keyalg RSA -keysize 2048 -validity 10000 `
        -alias upload
It asks for a password and some details (name, organization, country). When it finishes, you have a file called upload-keystore.jks in your home folder.
If you get "keytool: command not found", run flutter doctor -v and look for the "Java binary at" line. keytool is in the same folder; use its full path, or add that folder to your PATH.
⚠️ Keep this file and its password safe. Back them up somewhere secure (not in a public GitHub repo). If you use Play App Signing (the default for new apps), Google holds the real app signing key and a lost upload key can be reset through Play Console support. Without it, a lost key means you can never update your app again.
Step 6: Tell Gradle about the key
Create key.properties
Create a file at android/key.properties:
storePassword=your-keystore-password
keyPassword=your-key-password
keyAlias=upload
storeFile=/Users/yourname/upload-keystore.jks
On Windows, use forward slashes or double backslashes in storeFile, for example C:/Users/yourname/upload-keystore.jks.
Add it to .gitignore, so your passwords never reach GitHub. Open android/.gitignore and make sure it contains:
key.properties
**/*.jks
**/*.keystore
Update build.gradle.kts
Open android/app/build.gradle.kts. Add the two imports and the code that loads the properties at the very top of the file:
import java.io.FileInputStream
import java.util.Properties

plugins {
    // ... leave the existing plugins as they are
}

val keystoreProperties = Properties()
val keystorePropertiesFile = rootProject.file("key.properties")
if (keystorePropertiesFile.exists()) {
    keystoreProperties.load(FileInputStream(keystorePropertiesFile))
}
Then, inside the android { ... } block, add a signingConfigs section before buildTypes, and change the release build to use it:
android {
    // ... namespace, compileSdk, defaultConfig and so on stay the same

    signingConfigs {
        create("release") {
            keyAlias = keystoreProperties["keyAlias"] as String
            keyPassword = keystoreProperties["keyPassword"] as String
            storeFile = keystoreProperties["storeFile"]?.let { file(it) }
            storePassword = keystoreProperties["storePassword"] as String
        }
    }

    buildTypes {
        release {
            signingConfig = signingConfigs.getByName("release")
        }
    }
}
The default project signs release builds with the debug key (signingConfigs.getByName("debug")) so that flutter run --release works. We replace that with our own release config.
Older projects have build.gradle (Groovy) instead of build.gradle.kts. The idea is the same, but the syntax is slightly different. Check the official Flutter Android deployment guide for the Groovy version.
Step 7: Check the release permissions
Debug builds can always use the internet, but release builds cannot unless you add the permission. If your app loads anything online (APIs, Firebase, network images), make sure android/app/src/main/AndroidManifest.xml has this line above <application>:
<uses-permission android:name="android.permission.INTERNET" />
This is the number one reason a release app "shows no data" while the debug app works perfectly.
Step 8: Build the APK
flutter build apk --release
When it finishes, your file is here:
build/app/outputs/flutter-apk/app-release.apk
Copy it to your phone and open it to install. Android may ask you to allow installing apps from unknown sources.
Smaller APKs with split-per-abi
A normal APK contains code for every type of phone processor. To make smaller files, build one APK per processor type:
flutter build apk --split-per-abi
This creates three files:
app-armeabi-v7a-release.apk   # older 32-bit phones
app-arm64-v8a-release.apk     # almost all modern phones
app-x86_64-release.apk        # emulators and a few devices
For sharing with friends, app-arm64-v8a-release.apk works on nearly every modern phone and is much smaller.
Step 9: Build the App Bundle for Google Play
flutter build appbundle
Your file is here:
build/app/outputs/bundle/release/app-release.aab
This is the file you upload to the Google Play Console.
Optional: obfuscation
To make your Dart code harder to reverse-engineer, add:
flutter build appbundle --obfuscate --split-debug-info=build/symbols
Keep the build/symbols folder. You need it to read crash reports from that build.
Step 10: Publishing on Google Play
Publishing is a topic of its own, but here is the overview:
- Create a Google Play Console developer account (one-time registration fee).
- Click Create app, enter the name and language, and answer the basic questions.
- Complete the app content forms: privacy policy URL, data safety, content rating, target audience and ads.
- Prepare the store listing: description, app icon (512 × 512), a feature graphic (1024 × 500) and phone screenshots.
- Upload your
.aabto a testing track first. - Send it for review. When approved, release it to production.
Note: New personal developer accounts must run a closed test with a minimum number of testers for a set number of days before they can publish to production. Check the current requirement in the Play Console when you create your account.
Release checklist
Before every release, go through this list:
- App name set in
AndroidManifest.xml - Unique
applicationId(notcom.example) - Custom app icon
- Version code increased in
pubspec.yaml - Signed with your upload key, not the debug key
-
INTERNETpermission added (if the app uses the network) - Tested with
flutter run --releaseon a real phone -
key.propertiesand.jksfiles not committed to Git
Common errors and how to fix them
"Keystore file not found for signing config 'release'"
The storeFile path in key.properties is wrong. Use the full path to the .jks file, and on Windows use forward slashes.
"keystore password was incorrect"
The passwords in key.properties do not match the ones you typed in keytool. Check for extra spaces at the end of the lines.
Google Play: "You uploaded an APK or Android App Bundle that was signed in debug mode"
The release build type still uses signingConfigs.getByName("debug"). Change it to "release" (Step 6) and build again.
Google Play: "Version code 1 has already been used"
Increase the number after + in pubspec.yaml, for example from 1.0.0+1 to 1.0.1+2.
The release app shows no data or images
Add the INTERNET permission (Step 7).
The app crashes only in release mode
Run flutter run --release with your phone connected to see the error in the console. A common cause is a package that needs extra setup for release builds; check that package's README.
What to learn next
- Revisit Your First Flutter App and release it as your first APK
- How to Add Images, Icons and Custom Fonts in Flutter to polish your app before release
- Browse my Flutter UI projects for complete apps you can build, customize and publish
Keep reading
More articles
· 9 min read
Dart Basics for Flutter Beginners: Variables, Functions and Classes
Learn the Dart you need for Flutter: variables, final and const, null safety, lists and maps, if and loops, functions with named parameters, classes, and async/await, with runnable examples.
· 9 min read
Flutter Row, Column and Stack Explained with Examples
Understand Flutter's core layout widgets: main and cross axis, mainAxisAlignment, crossAxisAlignment, Expanded, Flexible, Spacer, Stack and Positioned, plus a complete profile card example.
· 7 min read
Flutter Navigation: How to Move Between Screens
Learn Flutter navigation step by step: Navigator.push and pop, passing data to a screen, returning results, pushReplacement for login flows, named routes, and when to use go_router.